Badassbuggy page #2
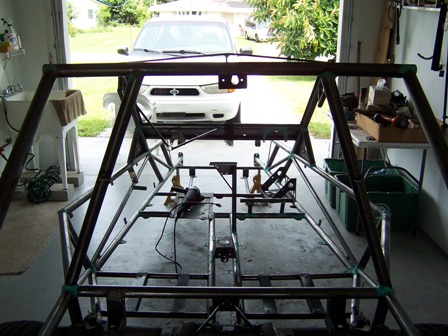
OK, welcome to page # 2. I have loaded more pictures below. Some are out of order as to the build progress but you get the general idea of what I have been doing and why.
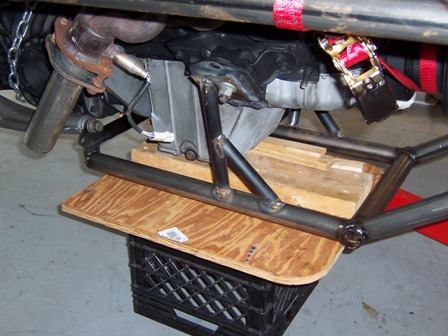
This is the motor mount I fabbed up to support the engine. As you will see later, I have also made an adjustable strut for each side with right and left Heim joints to transfer the weight of the engine up to the upper rear chassis rails with another welded in strut from the lower chassis rail to the upper to triangulate the stress load. I used the stock Ford motor mounts that came with the engine.
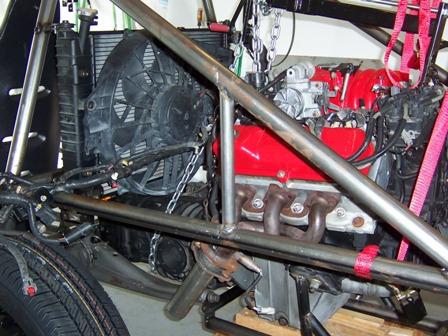
This is the upper welded strut that will help carry the engine load from the lower cradle motor mount to the adjustable strut to the upper chassis frame rail. You can also see the start of the exhaust fabricating to route the exhaust out the back of the car. The headers are stock from Ford that came with the engine. I had the muffler shop make some 180 degree bends and then cut, fit and welded them to the mufflers to make a smooth line out the rear of the car. I ground and dressed all the welds and painted them with high temp paint. I also install nuts for the sensors so the engine will cold start correctly. (I hope) LOL

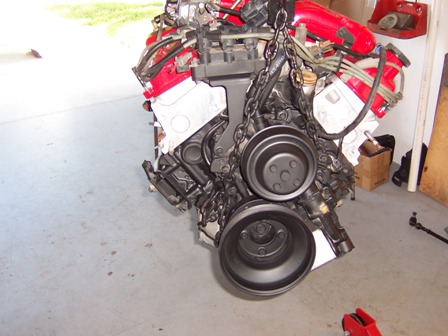
Ford 3.8 engine, stock. I gave it a good bath and then taped everything off and shot it flat black except for the aluminum heads. Didn't need a whole lot of cleaning etc. as its low mileage. I sent the valve covers and intake out to be powder coated and they turned out real nice.
After painting.
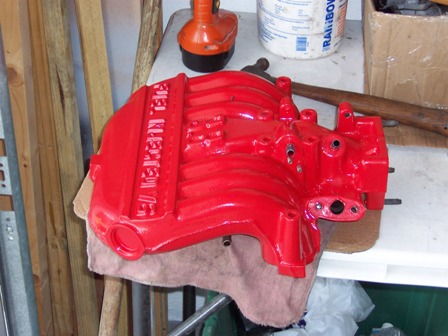
Powder coating done and installed.
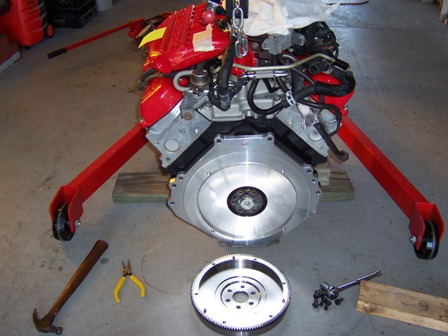
The start of the installation of the Kennedy adapter kit. This is a really good quality and engineered kit and I am very pleased with it. I ordered it complete with clutch, pressure plate and throwout bearing. Its balanced and clearance and was really easy to install. I recommend them highly. This is the first piece to mount up.
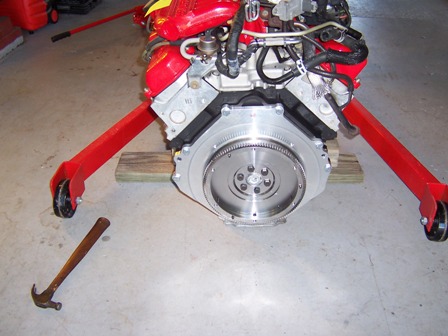
Flywheel is installed.
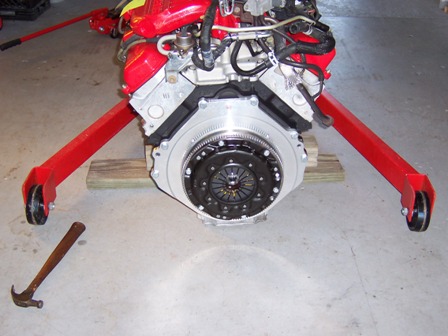
Clutch and pressure plate installed. Nice looking parts! Trans is next and then into the chassis for fitment and brackets
I've started to try to get all the small parts cleaned and painted so when final assembly begins, all I have to do is put them in place. Lots of bolts and washers, lug nuts and brackets etc.
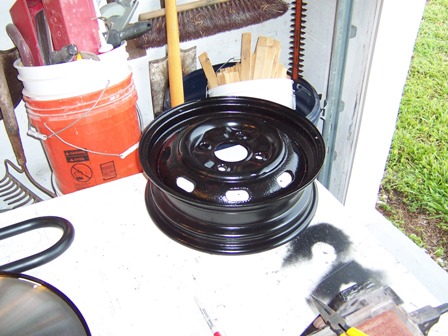
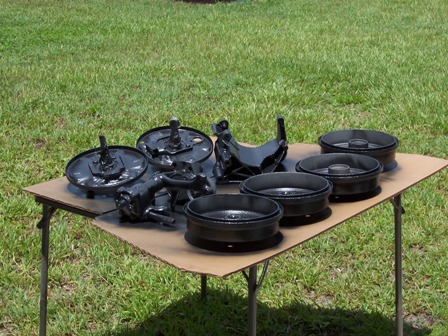
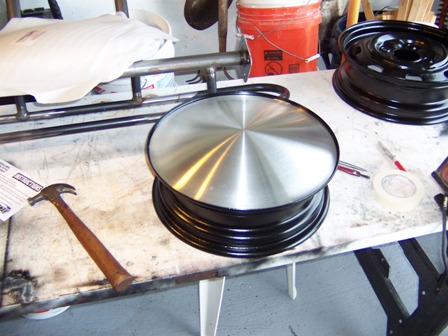
Above shot and next are of the stock rims I had powder coated and the aluminum moon discs to go on them that I got from Speedway for wheel covers. It will give it a retro street rod look when its done. Just something a little different.
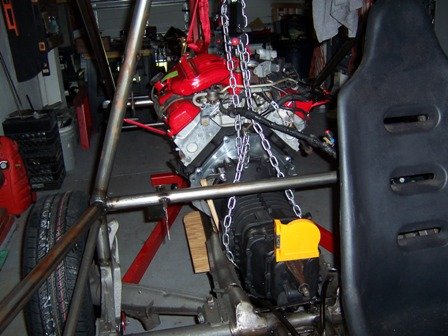
I started getting the engine into place by using an engine hoist as well as several small ratchet ties to get the engine and trans centered into the chassis. Took a lot of time measuring from the trans axle flanges to the torsion flanges to get it equal as well as front to back. Can't spend enough time here as it is important to prevent future problems. Once its in place the motor mounts were fabricated and now all the ancillary pieces can be made and fitted into place. Exhaust, computer mounting,wiring, shifter tube, radiator tubes and hoses etc. I left the hoist and ties in place until all the engine mounts and bracing were in place and welded to prevent movement.
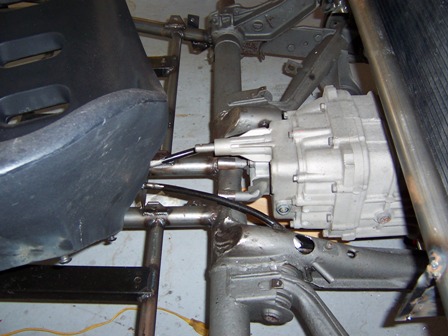
This is the front trans mount. I used the stock rubber mount that came with it and made two tubes for it to basically press fit into . This makes everything for the engine and trans mounted in rubber to minimize shock and stress on the mounts and chassis.
Engine cradle final welding and dressing for paint
Engine cradle after prepping. Paint laid down real nice!
This is the start of finger molding all the joints so they are smooth for the paint work to follow.
A lot of work went into this piece. I didn't realize how much the press punch warped the metal as well as the heat from the welding I did to attach it. I did a lot of hammer and dolly work and finally got it good enough for bondo and sanding. Won't make that mistake again!!
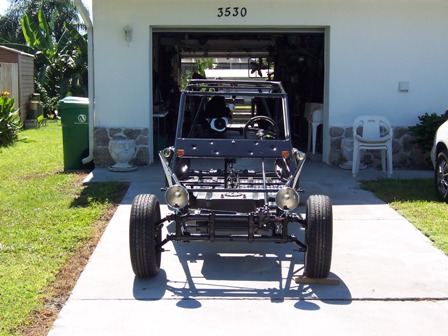
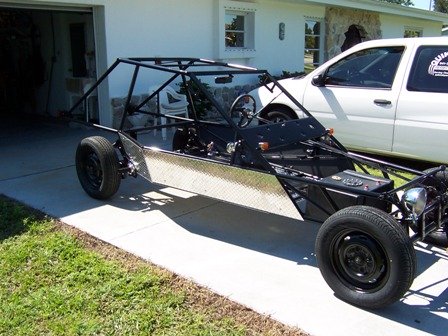
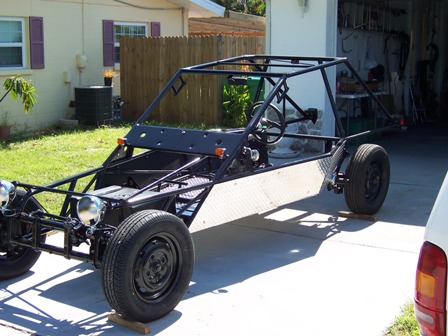
The following pics are after paint and with some of the final assembly being done. Waiting on the transmission to come back and getting ready to do the wiring and run brake lines etc.


Click here for page 3
|